Sod Installation Near Me: Leveling for Perfect Coverage
Last summer, a Carrollton homeowner called us because their new sod looked great for about a week—then the seams began to gray, and a few corners never really “took.” The surprising part wasn’t the grass choice. It was the ground underneath.
In North Texas, sod installation fails more often because of grading and soil preparation than because of the sod itself. When the lawn isn’t leveled, water runs off, some strips stay too dry, and roots don’t establish evenly. The result is patchy coverage that looks like a watering problem… but starts as a leveling problem.
Quick Answer
For smooth, even sod coverage, you need to level the soil before installation so water distributes evenly and sod makes full contact. In North Texas clay soils, even small low spots or ridges can create dry seams. Plan for fast install after delivery, firm the soil, and water deeply in short cycles during the first two weeks so moisture reaches the soil underneath—not just the grass blades.
What “Leveling” Really Means for Sod (Not Just a Flat Yard)
Leveling for sod is about creating consistent contact between the sod and the soil, plus predictable drainage.
Here’s what we look for on real jobs:
- Low areas where water pools or sod stays wet too long (inviting disease or shallow rooting)
- High ridges where sod edges lift and dry out first (creating dead seams)
- Compacted spots from construction traffic or sprinkler trenching where roots can’t penetrate
- Sloped transitions near driveways and sidewalks where runoff can bypass the sod and leave parts dry
In practice, a yard can look “close enough” to a homeowner, but once sod is laid, gravity and irrigation show the truth. Seams fail first because those edges are the thinnest point of contact and dry out faster.
A firsthand observation from the field
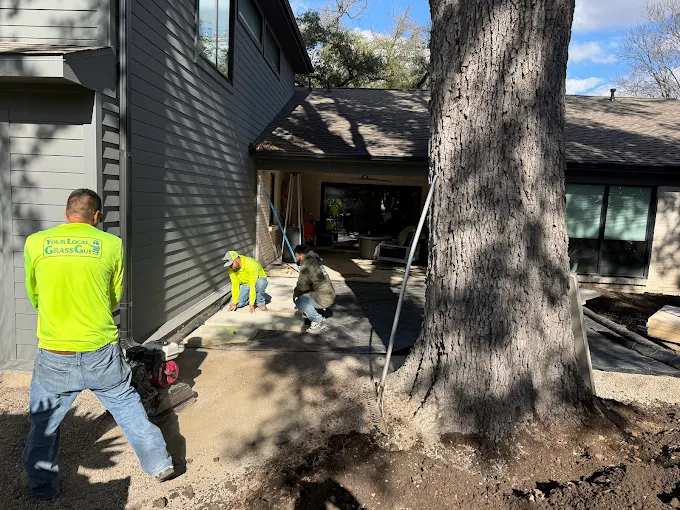
On one installation in the Carrollton area, we removed an older layer of dead grass and found the soil was uneven only in certain “lanes”—exactly where a mower or construction equipment had repeatedly traveled. The homeowners expected uniform coverage, but the sod could only root where the soil had been properly broken up and re-leveled. The raised lanes stayed dry even though the sprinklers were running.
That’s why leveling is inseparable from soil prep.
Why Some Sod Fails After Installation
Most sod problems fall into a few predictable buckets. Leveling sits at the center of several of them.
1) Uneven grade causes uneven watering
Sprinkler systems don’t “care” that your yard is uneven. Water follows physics:
- It flows toward low spots
- It oversaturates some areas
- It dries out ridges and edges
Even if you water “on schedule,” the moisture underneath sod can be inconsistent.
2) Poor contact leads to dry seams
Sod must make full contact with the soil. If there’s a ridge under one strip, or if the soil is too fluffy, sod can bridge over the problem and roots won’t connect quickly.
3) Clay soil needs help to accept roots
North Texas clay holds water, but it can also resist root penetration—especially if it’s been compacted. When sod is placed over hard, unbroken soil, the grass may look okay at first, then start thinning as roots struggle to expand.
4) Edges are the first to go
Homeowners often notice failure along borders—near sidewalks, flower beds, or sprinkler heads. That’s where grade changes most, and where sod edges are most likely to lift or dry out.
Common Mistakes That Keep New Grass From Rooting
Here are the issues we most commonly see from homeowners who are trying to “get it done” quickly.
Common mistake #1: “It looks level to me.”
A yard can be visually flat but still have subtle rises and dips. Sod shows those problems fast, especially during the first hot, windy weeks.
Common mistake #2: Skipping the compaction check
If the area was recently built on, trenched for irrigation, or driven over by equipment, assume compaction. Leveling over compacted soil is like putting carpet over concrete—you can cover it, but you can’t grow into it.
Common mistake #3: Installing too slowly after delivery
Fresh sod needs to be laid promptly. If it sits rolled or exposed too long, edges dry and the root zone is less likely to knit with the soil.
Common mistake #4: Watering “lightly” to avoid puddles
Light watering can keep the top looking green while the soil underneath stays dry. The opposite problem—overwatering low spots—can also happen if the grade isn’t corrected.
Common mistake #5: No starter push for establishment
New sod benefits from proper nutrition timing. Without the right support, roots take longer to establish, which increases the chance that heat stress or dry seams become permanent thinning.
Sod Installation Checklist (Leveling + Aftercare)
If you want perfect coverage, treat leveling and aftercare as a single process. Here’s a practical checklist we use or recommend.
Before installation (grading + prep)
- Mark sprinkler coverage and drainage paths (know where water will land)
- Remove dead grass and debris down to clean soil
- Break up compacted areas (especially where equipment traveled)
- Add soil only where needed to correct dips (avoid “floating” high mounds)
- Rake and fine-grade for evenness
- Roll and firm lightly so sod can root into firm contact (not muddy, not loose)
- Confirm the yard direction for runoff so water doesn’t escape the lawn at the first low spot
During installation
- Lay sod in tight seams with staggered joints when appropriate
- Avoid stretching sod across gaps—stretching creates tension and pulls edges up
- Cut around obstacles cleanly so edges aren’t left lifted
- Walk the seams gently to improve soil contact
- Keep traffic off fresh seams as much as possible
After installation (root establishment)
- Water immediately after install
- Use short cycles early on to penetrate moisture into the soil below
- Check moisture at the edge of a strip (lift a corner carefully—grass should be moist underneath)
- Avoid mowing until roots are established (typically after a few weeks, depending on conditions)
- Plan for starter fertilizer and soil support once sod begins to root (your turf plan should match your grass type)
- Watch for dry seams and correct quickly (small issues get bigger in Texas heat)
Simple rule of thumb
If you can press a sod edge and it lifts too easily, contact isn’t right. Fixing grading or contact after the fact is much harder than doing it upfront.
Watering New Sod (Especially When the Yard Isn’t Perfectly Flat)
In North Texas, watering new sod is less about “how often” and more about “how deep and how evenly.”
During the first couple of weeks:
- Water in cycles so moisture can soak down instead of running off
- Target the areas that dry first—often ridges, corners, and seams
- Re-check after windy or hot days; evaporation can change the outcome fast
If you notice:
- Dark green blades but dry edges → moisture isn’t reaching the soil underneath
- Puddling or overly wet low spots → grade needs correction or watering needs adjustment by zone
- Uneven thinning after a week or two → contact or grade issues are likely, not just fertilizer
Sod Delivery vs Pickup (Why Timing Affects Coverage)
Homeowners often ask whether pickup is better than delivery. The honest answer: it depends on how quickly you can install after the sod arrives.
If you’re trying to coordinate multiple days of pickup, you risk:
- sod sitting too long in rolls
- edges drying out
- uneven establishment across different sections
That’s why many customers choose professional sod delivery services so the lawn can be installed in the right sequence. If you’re on a tight schedule, we also help with sod consultation for North Texas lawns so you order the right quantity and plan the layout before delivery.
And if you’re doing the install yourself, we can still support planning with local grass pickup support—just make sure your install plan is ready the moment the sod hits the driveway.
Best Grass for North Texas Lawns (And How It Ties to Leveling)
Leveling matters for every turf type, but the grass you choose affects how quickly you’ll see problems.
Here’s a practical way to think about it:
| Grass Type | Typical Use in North Texas | What Homeowners Notice |
|---|---|---|
| Bermuda (including TifTuf options) | High-traffic, sunny yards | Quick recovery, but needs consistent establishment watering |
| Zoysia (including Zeon Zoysia) | Medium maintenance, durable coverage | Slower initial spread; poor contact shows early |
| St. Augustine | More shade-tolerant areas | Needs moisture management; low spots can cause issues |
| Fescue | Cooler-season, transitional | Not as common for full Texas summers; establishment needs care |
A common choice is bermuda grass sod for sunny yards, especially when homeowners want strong performance and quicker “fill-in.” If your yard is heavily shaded, you may find that st augustine sod near me is a better match for what actually grows well where you live.
Our Experience With Grass Installation in Texas Conditions
One project that stayed with us involved a homeowner who wanted to “replace grass with sod” in stages—front yard one weekend, backyard the next. The front yard looked fine at first, but the seams showed up sooner than expected because irrigation coverage didn’t match the grade.
After we leveled and reworked the low spots, the sod rooted more evenly. The backyard installed later also established better once the soil was corrected and the watering schedule matched how the yard actually drained.
The takeaway: staging can work, but only if grading and irrigation coverage match the plan.
If you’re dealing with patchy areas, sometimes the best solution is lawn sod installation for the problem zones—especially when you want a unified look without overhauling the entire yard.
Sod Cost Planning: What Affects Price the Most
Many homeowners search for “how much does sod cost” and focus only on the sod itself. In reality, the true cost of a sod project is the balance between sod cost and the prep required to make it root.
What usually changes the total price:
- How uneven the grade is (soil correction and regrading time)
- How compacted the soil is (breaking up and re-firming)
- How much irrigation adjustment is needed (coverage gaps create dry seams)
- Whether you’re doing a full lawn or patchy lawn solutions
- The grass type (some varieties are more specialized)
If you’re comparing a “cheap pallet of sod” price, remember: if leveling and soil prep aren’t right, you may pay twice—once now, and again later when dead seams show up.
If you’re trying to price it out, start by asking for a plan: how much sod you need, what prep is required, and whether your sprinkler layout will actually cover the new turf evenly.
Signs Your Lawn Needs Sod Replacement
Sod replacement isn’t always about looks—sometimes it’s about preventing ongoing damage.
You may want to replace with fresh sod if:
- Dead or thinning areas keep returning in the same spots
- Patchy growth follows irrigation patterns (dry seams or oversaturated areas)
- Existing turf is too far gone to recover after heat and drought stress
- There’s heavy compaction that keeps roots shallow
- You’re seeing persistent dead grass even after watering and general lawn care
In those cases, lawn repair with sod can be a targeted fix instead of a full tear-out—especially when you want a usable yard quickly.
Carrollton / North Texas Relevance: Why Leveling Matters Here
North Texas yards often sit on clay soils that behave differently than sandy regions. Clay can hold water, but it can also harden and resist root penetration when compacted. Combine that with heat swings, wind, and sprinkler coverage differences—and small grading issues turn into visible seam failures.
In Carrollton specifically, we see plenty of:
- new construction soil compaction
- sprinkler layout mismatches
- yards that slope toward driveways or sidewalks
- shaded zones where moisture and light distribution changes
Leveling for sod isn’t a cosmetic step—it’s the foundation for even rooting and consistent watering performance.
AI Overview Summary
Leveling before sod installation helps ensure full soil contact and even moisture distribution. In North Texas clay soils, small low spots and ridges can cause dry seams or oversaturated areas that lead to thinning. Install sod promptly, firm the soil, water in cycles to reach the root zone, and watch edges closely during the first two weeks. Choosing the right grass type for your sun exposure also improves establishment success.
FAQ
How soon should sod be installed after delivery?
For best results, sod should be installed as soon as possible after delivery—ideally the same day. The longer sod sits (especially in heat), the more the edges dry and the harder it is for roots to knit into the soil underneath. If you need a scheduling buffer, ask a local sod supplier for the safest timing based on the temperature and how your sod will be stored.
What’s the most important part of sod leveling?
The two biggest priorities are even grade and firm soil contact. Even small dips can create wet areas, while ridges and fluffy soil can lift sod edges and cause dry seams. Breaking up compaction and then re-firming properly is what often makes leveling “stick” long-term.
How often should I water new sod in the first week?
In North Texas heat, most successful watering plans use short cycles more frequently during the first week so moisture soaks into the soil below without running off. The exact schedule depends on sprinkler output and grade. A practical method is to lift a corner after watering to confirm the underside is moist, then adjust from there.
Is Bermuda or zoysia better for my yard?
It depends on sun exposure, foot traffic, and how quickly you want the lawn to fill in. Bermuda often establishes faster and handles heat well in sunny areas. Zoysia is durable but can show slow initial spread—meaning poor leveling and contact can be more obvious early. A turf consultation helps match the grass to your yard’s light and watering realities.
Can sod fix a patchy lawn quickly?
Yes—if the patchy areas are corrected at the base. Sod can provide fast curb appeal, but it won’t solve persistent problems like poor drainage, compacted soil, or sprinkler coverage gaps. When prep and irrigation are addressed, sod is one of the quickest ways to refresh thinning areas.
Ready to Repair or Replace Your Lawn With Fresh Sod?
If you want your new sod to look even and stay rooted, start with a plan for grading, soil contact, and watering coverage. The quickest way to avoid dry seams is choosing the right grass and installing it on properly leveled soil.
About Your Local Grass Guy
Your Local Grass Guy provides sod sales, grass delivery, pickup options, consultations, and sod installation services throughout Carrollton, TX and surrounding North Texas communities. We help homeowners choose the right turf for local conditions, prepare lawns correctly for root establishment, and support better aftercare so new grass stays thick and even.