Lawn Sod Installation Tips for a Strong Root Start
If your Carrollton lawn is turning patchy after summer—thinning in rows, drying out at the seams, or showing “dead” spots that look worse every week—you’re not alone. Many homeowners start by ordering fresh sod, then realize too late that the real problem is often the root start: soil moisture, contact, and preparation.
We see it all the time in North Texas. Sod can look great for a few days, then fail underneath where roots never fully connected to the soil. The fix isn’t just “more watering.” It’s getting the conditions right before install, during install, and through the first few weeks of establishment.
Quick Answer
For a strong root start, install sod on well-prepared soil that’s firm and free of debris, keep it from drying out, and water so moisture reaches the soil underneath—not just the top. In North Texas, the first 10–21 days matter most: frequent, deep-ish watering early on, then gradually less frequent as roots take hold. Choose the right grass for your sun/shade and mowing tolerance (Bermuda and zoysia handle heat well; St. Augustine prefers more moisture; fescue is best where you can manage shade and seasonal stress).
What Homeowners Often Overlook
The biggest misconception we run into: “Sod is already alive, so it will root no matter what.”
Sod plants are alive, yes—but they’re also delicate. During delivery, staging, and install, the turf can lose moisture. If the soil underneath is too compacted (common in North Texas clay), roots struggle to penetrate and quickly form weak connections. Then heat and wind hit, and seams open up.
A realistic homeowner scenario we commonly see
A family in Carrollton decides to “replace grass with sod” because the yard looks thin in the back. They pick up a few pallets, lay it over existing soil that still has clumps and old thatch, and water lightly to “keep it green.” The sod stays pretty for a week—then the edges lift and the middle starts browning. When we inspect, the soil under the seams never softened enough for roots to move into the ground. The sod wasn’t getting the deep moisture it needed, and it wasn’t getting consistent contact with the soil.
Why Some Sod Fails After Installation
Sod failure usually falls into three buckets:
1) Soil contact wasn’t consistent
Sod needs solid contact. If you lay turf over soft mounds, ruts, or uneven spots, roots can’t maintain consistent contact. The result is “floating seams”—areas that look fine at first, then loosen as the surface dries.
2) Moisture didn’t reach the root zone
A quick misting schedule often keeps the top green while the soil underneath stays dry. In North Texas, clay holds water differently than sandy soils—so surface wetting can mislead you.
Field observation: On installs where homeowners used a light sprinkler cycle, we often find the top 1/2 inch damp but the next inch dry. Sod can survive that mismatch for a short time. After that, roots stall and the turf starts to thin.
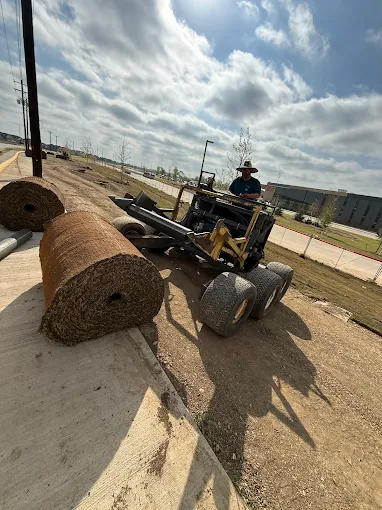
3) The sod dried out between delivery and installation
Even if the sod was “fresh,” leaving pallets too long in heat or stacked too tightly can reduce survival. Sod should be installed as soon as possible after delivery or pickup—especially during warm spells.
Mistakes That Keep New Grass From Rooting
Here are the most common mistakes we see, along with what to do instead.
Common mistake homeowners make: watering on a schedule without checking depth
Many homeowners follow a generic “water twice a day” plan. The problem is that sprinkler output varies—pressure, nozzle type, distance, wind, and even sprinkler heads getting partially blocked by landscaping can change how much water you’re actually putting down.
Fix: After your first watering cycle, check moisture down the way you can—lift a small corner of sod in a hidden area (or use a screwdriver/soil probe) and confirm the soil underneath is moist, not just the top.
Common mistake: skipping soil cleanup and leveling
If there’s debris, old dead roots, or clumps, sod won’t sit evenly. That creates gaps and weak root contact.
Common mistake: installing over compacted construction soil
New construction yards often have compacted areas where equipment rolled. Sod can sit on top, but roots can’t push through dense layers quickly.
Common mistake: walking and rolling incorrectly
Dragging a heavy roller across uneven ground or walking repeatedly in one path can shift seams. Sod should be laid neatly and pressed into contact without creating ruts.
Common mistake: choosing the wrong grass for the yard conditions
Even the best installation can struggle if the grass doesn’t match the site.
- Full sun, heat-tolerant yards: Bermuda or zoysia are common choices.
- Areas that need a more forgiving approach to moisture: St. Augustine may fit better, but it still needs solid establishment care.
- Cooler-season fescue: a good option in some situations, but it’s not the same “set it and forget it” as warm-season grasses.
What Actually Helps Sod Establish Strong Roots
If you want a reliable root start, think in stages: prepare → install → water → monitor.
Sod preparation checklist (do this before install)
- Remove debris and dead thatch (no rocks, no clumps, no “hidden” buildup under the sod)
- Level high spots and fill low spots so sod lays flat
- Loosen compacted areas so roots have a path into the soil
- Confirm drainage—if water pools, sod will struggle
- Plan your layout so seams stay tight (stagger pieces like brickwork)
- Stage sod correctly to reduce drying (don’t leave it exposed in heat)
Installation checklist (day-of)
- Install promptly after delivery/pickup
- Keep seams tight (avoid gaps that become dry lines later)
- Press sod into contact along edges and seams
- Avoid heavy foot traffic while turf is settling
- Water immediately after install once the first sections are laid
Watering new sod (the part that really determines success)
In North Texas heat, the first few weeks are where lawns win or fail. A good plan is about deep, consistent moisture rather than surface-only watering.
A practical approach:
- Days 1–7: Keep sod and the top layer consistently moist. Water more frequently, but confirm moisture penetrates below the surface.
- Days 8–14: Begin reducing frequency slightly while maintaining enough moisture for roots to move downward.
- Days 15–21: Transition toward deeper, less frequent watering as roots establish. At this stage, the goal is stronger drought tolerance.
Starter fertilizer and soil amendments: Many new installs benefit from a starter fertilizer strategy, especially if soil is low in nutrients. Compost can also help with soil biology and moisture retention—when it’s incorporated appropriately, not piled on top like mulch.
Sod Delivery vs Pickup (and how it affects root start)
If you’re comparing options, here’s the practical difference we see on installs:
Delivery often helps because it reduces the time sod sits in your yard or in a pickup process. Less time sitting in heat usually means fewer “dry edge” issues.
Pickup can work well when:
- you have access to unload quickly,
- install is scheduled immediately after arrival,
- and you’re not juggling other tasks that delay the install.
If your goal is a smooth root start, consider planning around install timing first, then choosing delivery or pickup.
For homeowners comparing logistics, you can review sod delivery services in North Texas and plan around your install day.
Our Experience With Grass Installation in Texas Conditions
On many North Texas projects, the biggest variable isn’t the sod variety—it’s the underlying soil behavior. Clay can be tricky: it may look moist on top but stay firm underneath, especially where the grade was compacted.
One anonymized example: a lawn repair project where we replaced dead grass in a narrow backyard strip. The homeowner had good intentions and kept the sod “looking green.” We adjusted the approach after install: more targeted watering to reach the root zone, plus a quick check on sprinkler coverage overlap and dry zones. The difference showed up in two weeks—seams tightened, and the turf stopped thinning at the edges.
That’s why we emphasize establishment care over “pretty first-week results.” A strong root start is what keeps the lawn stable through Texas summer stress.
Best Grass for North Texas Lawns
Choosing the right grass is part of the root plan. Here’s a quick, homeowner-friendly guide to common options you’ll hear about around Carrollton:
| Grass type | Common use in North Texas | Establishment notes |
|---|---|---|
| Bermuda sod | Sun-heavy yards, active households, durable coverage | Tends to establish well with proper watering and mowing timing |
| Tiftuf Bermuda sod | Homeowners who want a very strong, heat-tolerant Bermuda option | Often chosen for performance in warm conditions |
| Zoysia sod (including Zeon zoysia) | Shade-tolerant lawns compared to Bermuda; lower mowing frequency | Establishment can be solid, but it still needs consistent early moisture |
| St. Augustine sod | Lawns needing a softer, lush look; often where moisture is manageable | Needs good establishment and consistent care to avoid stress |
| Fescue sod | Cooler-season lawns, some transitional needs | Not the same warm-season durability; planning matters |
If you’re specifically looking at fresh sod near me, the best next step is matching grass to your yard’s sun, traffic, and watering reality—not just picking what’s most popular.
Carrollton, TX Relevance: What Makes North Texas Different
North Texas yards are often dealing with a mix of heat, clay soil, and inconsistent sprinkler coverage. That combination shows up quickly during sod establishment.
A few local realities we plan around:
- Heat spikes can dry exposed edges fast.
- Clay compaction can block root penetration even when the surface looks fine.
- Watering patterns (sprinkler throw distance, wind, and head overlap) create hidden dry zones that show up as seams.
That’s why a strong plan for lawn repair with sod isn’t just about laying turf—it’s about making sure your soil and watering match the grass’s establishment needs.
If you want help with selection and timing, a sod consultation for North Texas lawns can help you avoid ordering the wrong grass or prepping the yard in a way that slows rooting.
Ready to Repair or Replace Your Lawn With Fresh Sod?
If your current lawn is patchy, thinning, or you’re trying to replace dead grass before it gets worse, get the root start right from the beginning. We can help you choose the right grass, plan delivery (or pickup), and set you up with a clean installation approach and aftercare plan.
About Your Local Grass Guy
Your Local Grass Guy provides sod sales, grass delivery, pickup options, consultations, and sod installation services throughout Carrollton, TX and surrounding North Texas communities. The company focuses on helping homeowners choose the right grass for local conditions, prepare lawns properly, and establish healthier turf through practical sod guidance, delivery support, and professional installation solutions.