
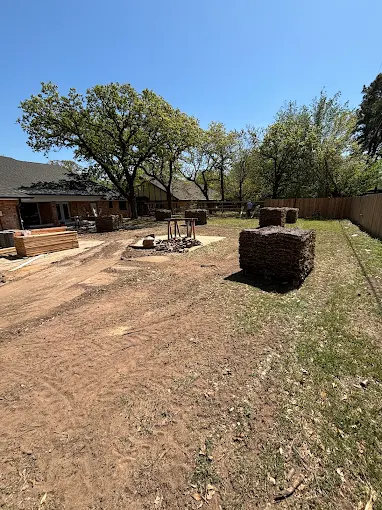
Sod Installation Near Me: Proper Prep for Lasting Growth
If your Carrollton lawn looks decent for a few days after delivery but then starts thinning at the seams, you’re not alone. We see it often with homeowners who order fresh sod near me to fix patchy areas—only to watch those seams open up as Texas heat hits and the roots don’t fully connect with the soil underneath.
The good news: most sod failures aren’t “bad sod.” They’re usually a prep-and-establishment problem—soil that wasn’t loosened enough, compacted clay that stayed hard, sprinkler coverage that didn’t soak evenly, or installation delayed long enough for turf to dry out.
Below is the real-world prep guide we use to help new lawns root in strong in North Texas conditions, so you get lasting coverage instead of a temporary green carpet.
Quick Answer
For lasting growth, sod must be installed on soil that’s properly prepared (loose, graded, and able to hold moisture), delivered and installed quickly (to prevent drying), and watered correctly (deep, consistent moisture that reaches the soil underneath). In Carrollton and surrounding North Texas, clay soil compaction and uneven sprinkler coverage are the two biggest reasons sod looks fine at first and fails later.
What Homeowners Often Overlook
1) Sod doesn’t “take” into hard, compacted clay
North Texas clay can look workable on the surface, but it often stays dense underneath. When we lift an edge during troubleshooting, we’ll frequently find roots that are only shallow—stuck in the thatch layer instead of penetrating the native soil.
2) Sod seams are a moisture test
Even a small gap between strips can become a weak point if that area doesn’t stay consistently moist. If your sprinklers miss a corner, a new seam can dry faster than the rest of the lawn.
3) “Green” isn’t the same as “rooted”
It’s common to see sod stay green for 7–14 days while it’s still living off stored energy. True establishment happens when roots start reaching and anchoring into the soil below.
Why Some Sod Fails After Installation
Here’s what we commonly observe in the field:
- Soil wasn’t graded for water movement. Low spots collect water; high spots shed it. Either way, moisture becomes uneven and roots don’t develop uniformly.
- Topsoil was added without loosening the base. Some homeowners spread compost or topsoil on top of compacted ground. That can help the top inch, but roots still struggle to penetrate deeper.
- Installation stretched too long. Sod is a living product. If the crew is delayed or the yard isn’t staged properly, edges dry out and won’t rehydrate enough to root.
- Watering wasn’t checked for actual coverage. Many systems run on a schedule, but sprinkler heads can be misaligned, clogged, or blocked by landscaping. We often recommend a quick “catch test” to confirm each area gets the same amount of water.
A realistic scenario we see in North Texas
One homeowner replaced a patchy front yard with sod after repeated summer stress. The sod looked great the first week. But after a heat wave, the lawn developed thin strips where the rolls met. When we examined the area, the native soil beneath the seam had remained hard and dry because the sprinkler pattern didn’t overlap consistently along that side. The turf survived temporarily, but roots never fully established at the seam.
Mistakes That Keep New Grass From Rooting
Common mistake homeowners make: “Follow the schedule” without checking the system
Many people set sprinklers to run more frequently right after installation—and assume the whole yard is getting soaked evenly. In reality, North Texas lawns often have:
- uneven head spacing,
- pressure changes between zones,
- mis-aimed heads,
- and dry spots that never get enough moisture.
Instead of guessing, homeowners should confirm watering reaches the soil under the sod.
Other frequent issues
- Installing over damp-but-compact ground. Sod needs moisture, but the soil must be loosened enough for roots to grow.
- Walking on sod too soon. It can create gaps and compaction that breaks root contact.
- Using weed control too early. Pre-emergent and other products have timing requirements. If you apply at the wrong stage, you can hinder establishment.
- Not reducing traffic and mowing too soon. Early mowing can pull at weak root systems.
Best Grass for North Texas Lawns
Choosing the right turf matters as much as installation. In our area, the “best” grass depends on sun exposure, irrigation reliability, and how much maintenance you’re willing to do.
Here’s a practical way to think about it:
| Grass Type | Common Use in North Texas | Strengths | Watch-outs |
|---|---|---|---|
| Bermuda sod | Sunny yards, active households | Fast recovery, strong heat tolerance | Needs consistent watering early; mowing/maintenance routines |
| TifTuf Bermuda | Homeowners who want durability | Very resilient in heat | Still needs good soil prep and establishment care |
| Zoysia sod | Mixed sun, homeowners wanting slower growth | Dense coverage, drought resilience once rooted | Establishment can take patience; not ideal for shady lawns |
| St. Augustine sod | More shade or moisture-friendly yards | Performs well with more water and shade | Often not the top choice for very dry/low-irrigation situations |
| Fescue sod | Cooler-season preference | Good transition and texture | Typically used where it fits the season and care plan |
If you’re comparing types, talk to a local sod supplier so you don’t end up with grass that struggles in your sun and watering conditions. For example, bermuda grass sod can be a great fit for many Carrollton yards, but shaded areas may perform better with a different approach.
Sod Installation Checklist
Use this checklist to plan prep, delivery, installation, and establishment. This is the sequence that helps sod root instead of just “survive.”
Before delivery (the prep phase)
- Test drainage and grade: Identify low areas where water collects and fix them before sod arrives.
- Remove debris and old thatch: Rake out dead material and remove rocks/clumps.
- Loosen compacted soil: Till or break up the top layer enough for roots to penetrate.
- Address bare spots properly: Don’t just lay sod over uneven soil—make the surface level.
- Plan sprinkler coverage: Confirm each zone reaches the lawn area evenly.
During installation
- Install quickly and in order: Keep sod from drying out between sections.
- Keep seams tight: Avoid gaps. Stagger joints slightly like brickwork when possible.
- Roll/press to ensure contact: Root contact matters more than appearance on day one.
- Water immediately after installation: Don’t wait for “later” if the weather is warm or windy.
After installation (the establishment phase)
- Water deeply and consistently: Moisture should reach the soil beneath the sod—not just the top.
- Avoid heavy foot traffic: Keep movement minimal until roots hold.
- Monitor seams and corners: These are usually the first places to fail.
- Mow only when ready: Follow the recommended timing based on growth and root establishment.
Watering New Sod (What Actually Works)
A lot of watering advice online is too generic. In North Texas, the goal is consistent moisture at the root zone without creating runoff or saturation.
A practical approach
- Day 0–3: Keep the sod surface and the soil underneath consistently moist. If you see the sod drying at the edges, your watering frequency or coverage is off.
- Day 4–14: Gradually adjust to encourage deeper rooting. The turf should not be allowed to fully dry out during establishment.
- After ~2–3 weeks: You can begin transitioning toward a more typical schedule for your grass type—still watching for thinning and stress.
How to confirm watering is reaching underneath
Do a simple “reality check”:
1. After watering, lift a small corner of sod in an inconspicuous area.
2. Look for moisture in the soil beneath (not just the sod surface).
3. If it’s dry underneath, you need more runtime, better coverage, or corrected sprinkler heads.
If your system isn’t reliable, we can help you plan sod delivery services that match your installation timing and watering plan—so you’re not rushed into establishing turf on a schedule that doesn’t fit your yard.
Our Experience With Grass Installation in Texas Conditions
Here’s a firsthand observation that helps explain why prep matters so much in our region:
When we install sod over North Texas clay that was “worked” but not loosened enough, the sod often roots at first only into the loose top layer. Then, as temperatures rise and watering becomes more targeted, roots don’t reach the deeper moisture. That’s when homeowners notice:
- seams opening,
- patchy thinning,
- and dead spots that look like they’re following irrigation patterns.
By contrast, when soil is properly loosened and graded so water spreads evenly, sod usually establishes more uniformly. You still need consistent watering, but the lawn has a better chance to anchor quickly.
Sod Delivery Planning: Pickup vs Delivery vs Installation
If you’re trying to coordinate sod near me with your schedule, timing affects success. Sod that sits too long can dry out—especially in warm, breezy weather.
- Pickup can work if you have help to stage and install immediately.
- Delivery is helpful when you want the turf staged in the right order and installed promptly.
- Installation services reduce delays caused by staging, grading, and tight seam work.
To help homeowners line everything up, we offer professional sod installation services and support options depending on your project.
If you’re deciding between pickup and delivery, you can compare what fits your yard and timeline with local grass pickup support or fresh sod delivery options. For larger jobs, staging pallets and coordinating access matters just as much as the grass type.
Carrollton or North Texas Relevance: Why Prep Changes Everything
In Carrollton, homeowners deal with:
- hot summer stretches that stress new roots quickly,
- clay soil that compacts under equipment and foot traffic,
- and sprinkler systems that sometimes don’t match the lawn layout after landscaping changes.
That’s why “lawn repair with sod” isn’t just about replacing dead grass. It’s about rebuilding the conditions where roots can grow. A seam that dries once during establishment can create a thin strip that becomes more noticeable over the next few weeks.
If you’re replacing patchy areas or doing a full install new sod lawn project, local planning around grading, sprinkler coverage, and installation timing is what separates a short-lived fix from a lawn that fills in and stays.
A Simple Case Example (Anonymized)
A homeowner in the area needed to replace a thinning back-yard section and a few front-yard patches before a family event. The yard had compacted soil from construction activity, and the sprinkler zone coverage wasn’t fully aligned with the new layout.
We:
- loosened the soil to improve root penetration,
- re-graded the area for more even moisture spread,
- installed sod quickly after delivery,
- and adjusted watering to ensure the soil underneath stayed moist during the first two weeks.
Result: the lawn filled in more evenly at the seams, and the replaced sections blended in instead of remaining visible strips.
Ready-to-Use Recommendation
If you want the best chance of success, choose grass based on sun and watering reality—not just what looks good in a photo.
- If your yard is mostly sunny and you want fast coverage, bermuda sod (including varieties like tiftuf bermuda sod) is often a strong fit.
- If you have more shade and more consistent moisture, st augustine sod near me may perform better depending on your irrigation and maintenance plan.
- If you’re looking for dense coverage and can be patient through establishment, zoysia sod near me can be a great option, especially zeon zoysia sod in the right conditions.
Before you order, a quick consult helps you avoid the most expensive mistake: buying the right grass but installing it into the wrong conditions. You can start with sod consultation for North Texas lawns so we can match the turf to your yard and schedule.
FAQ
How soon should sod be installed after delivery?
Sod should be installed as soon as possible after delivery—ideally the same day. If sod sits too long (especially in heat or wind), the edges can dry out and lose the moisture needed to root. If you anticipate delays, it’s worth planning your delivery window with your installation timeline so the turf stays viable.
Is bermuda or zoysia better for my lawn?
It depends on your sun exposure and how you manage watering and mowing. Bermuda typically establishes faster and handles heat well, while zoysia is often valued for dense coverage and slower growth. If your yard has more shade, the best choice may shift. A consultation based on your yard conditions is the safest way to decide.
Should I use starter fertilizer with new sod?
Starter fertilizer can support establishment, but timing and product choice matter. In many cases, applying a starter fertilizer at the right stage can help root development. If you’re also planning weed control (like pre-emergent), coordinate timing so you don’t interfere with establishment.
How long does it take new sod to root?
Many homeowners see green color within days, but rooting takes longer—often a couple of weeks to establish more solid anchoring. The lawn should be monitored closely during that window, especially at seams and corners.
Ready to Repair or Replace Your Lawn With Fresh Sod?
If you’re dealing with patchy areas, dead grass, or seams that keep showing up after replacement, the fix usually starts with proper prep and establishment—not just ordering turf. Get help matching the right grass to your North Texas conditions and planning delivery and installation so your lawn can root and thicken.
About Your Local Grass Guy
Your Local Grass Guy provides sod sales, grass delivery, pickup options, consultations, and sod installation services throughout Carrollton, TX and surrounding North Texas communities. The company focuses on helping homeowners choose the right grass for local conditions, prepare lawns properly for root establishment, and establish healthier turf through practical, experience-driven guidance.